Grilled Flavor from the Oven

Grilled Flavors with Your Oven

Happy Saturday morning, everyone! Today, I want to tell you how to make corn and hotdogs in the oven so that they taste and look like they just came off the grill. As with any grilled food, you can the scorch the corn or char the hotdogs as light or as dark as you like. 

Corn on the Cob

Grilled flavor from the oven
Image courtesy of Christina Branco via Unsplash

For the "grilled" corn taste you'll need clean corn (right?), aluminum foil, salt, and margarine.

  • Preheat the oven to 550 degrees.
  • Tear off sections of aluminum foil to wrap around each ear of corn later. 
  • Set each ear of corn onto its individual foil wrap.
  • Spread margarine over every inch of each ear of corn.
  • Salt the margarine that you spread onto the corn.
  • Wrap corn tightly in the aluminum foil.
  • Place wrapped corn on the aluminum-lined baking pan with the foil seal on the corn facing up so you can maintain as much of the margarine inside the foil as possible.
  • Put in oven on middle rack position to cook for about an hour (check at about 45 minutes to see if any scorching has started to occur on the kernels). Corn and foil will be hot and steamy so handle with extreme caution.
  • After the initial 45-minute check, you should check the corn about every 15 minutes or so until the corn is scorched to your satisfaction. Again, use extreme caution each time you check.
  • When satisfied, with the scorch, carefully remove the pan from oven as the corn may roll around even when wrapped in foil. Use tongs and a fork to carefully remove the foil from the corn. 
  • Despite all our efforts to maintain the butter throughout the cooking process, most of that margarine that you put on the corn will evaporate. But we needed it to create that beautiful and tasty scorch. So, salt and butter the corn again to your desired taste.

Hotdogs

For the "grilled" hotdogs taste, you'll just need your favorite brand of hotdogs and a pack of buns. I feel that I need to warn you that the hotdogs will likely splatter and make a mess in your oven. If that doesn't bother you, carry on with the instructions below.
  • Preheat the oven to 550 degrees.
  • Line a baking pan with aluminum foil.
  • Place hotdogs on the foil-lined pan.
  • Watch carefully. Oven will fill with smoke as the hotdogs become hot and the grease splatters, so open the oven door carefully to check on the char. 
  • As with the corn, you will remove the hotdogs when you're pleased with the amount of char that forms on the hotdogs as they cook in the oven. 
  • Place your hotdogs on the buns. Top with your favorite condiments. Enjoy!
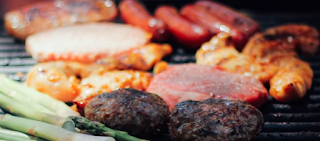
grilled hotdog flavor from the oven
Image courtesy of Stephanie McCabe via Unsplash

I hope you enjoyed today's post. Thanks so much for dropping by today.

God bless you and take care,

Patricia

#simplyrecipes
#womenhelpingwomen
#helpingothers


Comments

Other Posts You Might Like

Charcoal Grilling Recipe for Beef Kebabs

Grilled Beef Kebabs AKA Kababs or Kabobs As I've already mentioned, grilling is my newest hobby . I call it a hobby; otherwise, I wouldn't do it because a lot of time is required to prep. Grilling is meant to get me outdoors more, so yes, it is a hobby. Someone recently told me that they enjoy grilling because it's so much easier and there is less cleanup. I'm not sure how that can be unless they simply add something onto the grill without prepping it with flavor. Gas grilling may be slightly easier since no prepping is needed to heat it up as with a charcoal grill. However, I'm not 100% sure about that. And honestly, I use more dishes for grilling than I normally would for cooking on my kitchen stove. But the flavors and connecting with nature are so worth it. Directions for these beef kebabs are for the charcoal grill.   But they can also be made in the oven or on a gas grill as well, using your own judgment for cooking times. This cook involves open-fire cooking,

Backyard Wildlife Adventures

Watching our backyard wildlife is a favorite pastime at our house. We have a birdhouse that the bluebirds occupy most of the spring. A few years back, we had 4 different bird couples nest in the birdhouse. Besides the bluebirds that year, we also had Carolina wrens, barn swallows, and black capped chickadees. We used to set out birdseed and had a birdbath to attract more backyard avian such as the titmouse, cardinal, blue jay, cedar waxwing, house finch, goldfinch, wren, barn swallow, black capped chickadee, and others. We eventually had to take down the bird feeder and remove the birdbath, because the squirrels, crows, pigeons, and grackles discovered our little bird paradise and would leave nothing for the birds we wanted to attract. Since removing those items, we still have the occasional cardinal, blue jay, goldfinch and house finch drop by - just not in abundance like we used to. And the woodpeckers that came around frequently stopped coming by when we took down the feeder and bi

Cast Iron Skillet Care

OMG! I bought a cast iron skillet. I thought this would be great to share with you this morning . I got my Lodge brand skillet at my local grocery store for about $10 less than I could buy it from Amazon. I didn't find out until I researched that Lodge is the best brand on the market according to other bloggers.  First thing you need to know is that you can't let these skillets get wet beyond washing them. Because they will rust. The second thing you need to know is these need to be seasoned with vegetable oil. So, even though my skillet was seasoned at the factory, I did have to wash it as soon as I got it home, because there was no covering on it. Everybody who was curious about a cast iron skillet had touched it before I bought it. Okay, probably not many people, but in my imagination, only 1 other person touching it was enough to warrant a thorough washing.  Once washed, I dried it with a completely dry dish towel - not one I had just dried my hands or other dishes with.