How to Clean Sticky Cutting Mats

As many of you know, I'm an avid crafter. And many of my crafts involve cutting fabric. So, a couple of weeks ago, I had the bright idea to cut some fabric into smaller squares and then cut circles from those smaller squares so I can make fabric yo-yos. Weeellll, the fabric squares kept slipping on the regular cutting mat as I used the circle cutter. When I had cut circles before, I cut them from the full length of fabric, which added more weight, so they didn't slip, and I didn't have this problem. So, now, I had to come up with another bright idea to fix my first bright idea. That's when I brought out my sticky cutting mats (for fabric) that I bought for my Cricut. Yes! I was so proud of myself for having this clever idea. I don't use the Cricut anymore, but I still have all the nice gadgets. 😉 So, cha-ching for me. 

Ugh! Another reality check. It turns out I'm not that clever after all. It had been quite a while since I've used these sticky mats, and I had forgotten something very important. While they worked well - briefly - the loose ends and "dust" from the fabric started covering all the sticky sections of the mats. Because of this, the fabric stopped sticking. Hmmm! So, I had to have yet another bright idea to get out of this not-so-sticky situation. I found the solution pretty quickly. Finally, redemption for all my "bright" ideas. And something I can pass along to you! See below to find out how I was able remove the fabric and preserve most of the sticky foundation. 
sticky fabric cutting mat
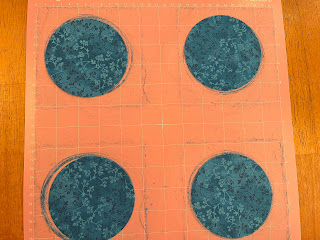
Squares placed on the sticky cutting mat

sticky fabric cutting mat
Circles cut from the squares

sticky fabric cutting mat
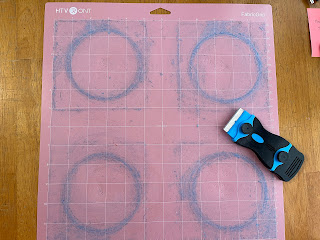
Cutting fabric on a sticky mat leaves a mess

cleaning sticky cutting mats
Use a razor blade in a safety holder like the one pictured above to scrape off the excessive fabric left behind

cleaning sticky cutting mats
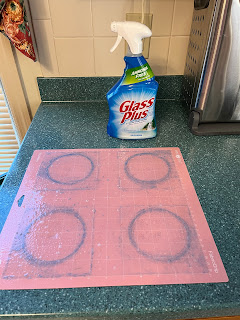
Spray glass cleaner on the scraped surface. Allow the cleaner to sit for a few seconds

cleaning sticky cutting mats
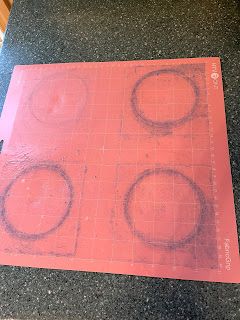
Wipe off the glass cleaner with a cotton rag (old sock, t-shirt, wash cloth, etc.). I've shown the difference between the top, left section that I cleaned and the other 3 uncleaned areas.

So, as you can see, this does a decent job of removing the excessive fabric left behind from cutting. You can let the mats air dry and the stickiness will come back. Drying the sticky surface with a blow dryer on high for a couple of minutes will quickly re-activate the stickiness faster. And it seems like the stick lasts a little longer when the blow dryer is used.  

Since these do have to be cleaned frequently when I'm cutting 2,000 or so squares, I use 2 mats so I don't have as many cleaning interruptions. You can use more mats if you want to. The HTVRONT FabricGrip mats that I buy instead of the Cricut mats actually have a better "sticky" life, and they cost much less too.

Over time, of course, the scraping and cleaning will take their toll on the mats. But this cleaning preserves them for a while so you don't have to replace them as often. I hope this helps you! 

Happy crafting,

Patricia


Comments

Other Posts You Might Like

New Christian T-shirts Designed and Listed on Etsy

I just finished designing a couple of Christian T-shirts and listing them on Etsy. You can read more about these and keep up with new arrivals on my Digital Potpourri Blog. If you have a custom request, you can contact us via Etsy messages . We'll be happy to try to produce a t-shirt to your liking as long as there is nothing profane, vulgar, immoral, licensed, trademarked or involving hate related to the design. One of the tees reads Love Obey Trust with bible books, chapters, and verses that coincide with these words. The other states God Lives Here with "Here" inside a heart shaped from mini hearts. So, basically 2 messages. God Lives and He lives in our hearts. 😇 Thanks for dropping by to read my updates today, Patricia

Finally a Few Nice Days in a Row

I've been waiting and waiting for spring temps to arrive for more than a couple of days without rain. And this is the week! We finally have some color in the yard and on our deck. So, I want to share what my husband, son, and I have been up to for the last few days. First of all, we had our first cookout on Sunday, April 28 to celebrate our younger son's birthday. That officially kicks off spring. I mixed the first batch of hummingbird nectar a couple of weeks ago, hoping the males would take advantage while the females were tending to their nests. As far as we can tell, 1 male has visited twice. Of course, we can't look out the window all of the time. But we do look out frequently. And we hang them in 2 locations that we can see directly from the kitchen windows. The rose bushes started blooming about a week ago, and I finally had time to take pictures of them. I pulled out the grass and weeds that were growing around them a couple of hours after I took the front-facing ...

Image Pixels to Inches, Flip Image, and Increasing DPI

Image Pixels to Inches, Flip Image, and Increasing DPI These are simple tips I want to share with those of you who are like me and do not have fancy programs to help when needing to convert pixels to inches, find out how many pixels an image has, and increase DPIs for better print quality. My tips are based on a Windows 11 OS and may not work on other systems. However, you may be able to do an internet search to explore your OS options based on the information I have provided below. I do not receive any compensation from these two sites listed. I use them because they are easy, free, and safe to use. These tips are helpful if you need to quickly figure how many pixels you need for a certain number of inches so you can print the right size every time without guessing and wasting printer ink until you do get it right. Also, sometimes, a print needs to be flipped (mirrored, reversed) for transfers. And last but not least, if you’re selling printable items, a higher DPI is needed for ...